How Shipping Containers Are Made: Learn How
Do you ever wonder how those massive shipping containers are made? Well, you’re about to find out!
In this article, we will take you on a journey through the fascinating process of creating these versatile containers.
From the evolution of their design to the meticulous steps taken to ensure durability and waterproofing, you will gain a whole new appreciation for the art of container construction.
So, buckle up and get ready to learn how shipping containers are made!
Introduction
These containers are constructed using a combination of materials, including corrugated steel, square tubing, and steel sheets.
The wall panels of a shipping container are made from corrugated steel, providing strength and durability.
The floor frame consists of steel floor beams, which support the weight of the cargo.
The roof panel is also made of corrugated steel, ensuring protection from the elements.
To assemble the container, corner posts are welded to the wall panels and roof panel, forming a sturdy structure.
Finally, wooden flooring is installed to provide a solid base for the cargo.
Through the meticulous assembly of these components, shipping containers are created, ready to transport goods across the globe.
Brief Overview of the Evolution and Versatility of Shipping Containers
It starts with square steel tubing that is cut and welded together to form the container’s frame. Rubber seals are then added to ensure a watertight seal. The container is constructed using weathering steel, known for its durability and resistance to corrosion. Large steel sheets are used for the walls, floor panels, and door frames. A protective coating is applied to enhance durability and resist harsh weather conditions.
For additional strength and stability, longer I beams are used in the construction. These containers have revolutionized the transportation industry by providing a secure and efficient means of moving goods across the globe.
Exploration of the origins and the pioneers behind the containerization concept
The concept of containerization, which has revolutionized global trade, was pioneered by innovators in the transportation industry. These shipping containers are made using various components and techniques.
The construction starts with longer I beams, which form the base of the container. A rubber seal is then attached to ensure a watertight seal.
The locking mechanism, consisting of smaller I beams, is integrated into the corner post assembly. Wall panels made of reinforced corner posts and fiber-reinforced polymer are then added to provide strength and durability.
The door assembly, also made of reinforced corner posts, is carefully installed. These components come together to create a sturdy and secure shipping container that can withstand the rigors of international transportation.
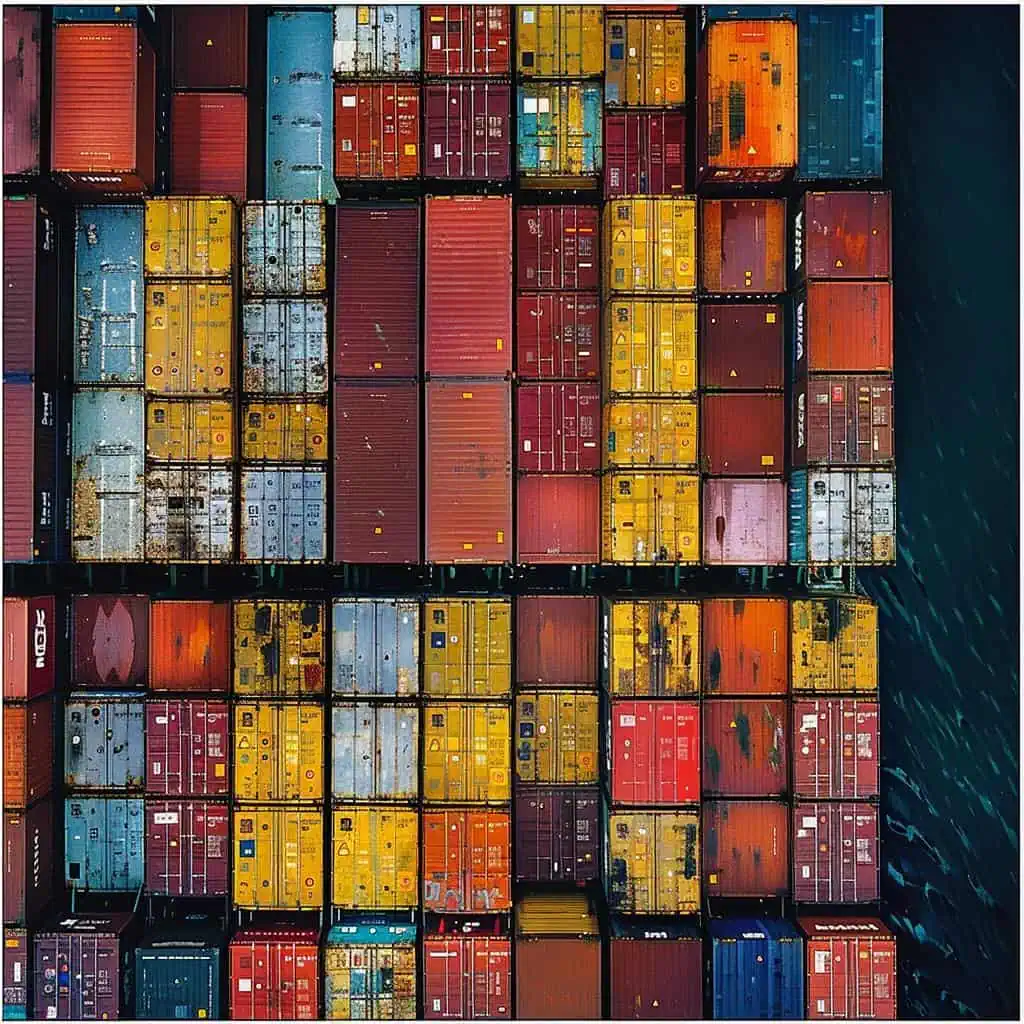
Where Shipping Containers Are Constructed
You can find the construction of shipping containers in various locations around the world.
The process of how shipping containers are made starts with the fabrication of the container frame. Longer I-beams are used for the main structure, while smaller I-beams are used for the cross members. These components are welded together using a flap disc angle grinder to ensure strong and smooth joints.
Additional layers are added to reinforce the container and provide insulation. A waterproof sealant is applied to prevent water leakage. In mainland China, plywood panels are commonly used for the flooring of the containers.
The rough welding joints are smoothed out and any imperfections are fixed before the container is ready for use.
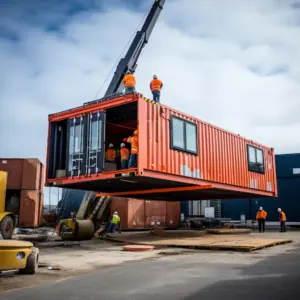
The Manufacturing Process
Now let’s dive into how these manufacturing hubs efficiently produce high-quality containers.
The process begins with the identification code being spray painted on the container, ensuring that it can be easily tracked and traced.
Next, multiple layers of paint are applied to protect the container from corrosion and harsh weather conditions. Before the final paint job, the container is sand blasted to remove any imperfections.
Floor braces are then installed to provide structural integrity. To ensure that the container is water tight, a preparatory coating is applied.
Finally, the container is ready to be delivered to its intended location, where it will serve its owner’s needs.
These manufacturing hubs have perfected this process, resulting in durable and reliable shipping containers.
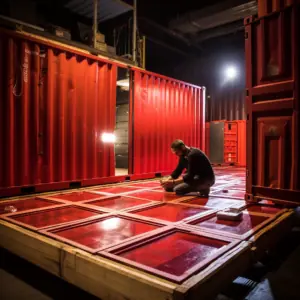
A. Wall Panels
To build a sturdy shipping container, start by constructing the wall panels with strong materials and secure joints. The wall panels are typically constructed using plywood panels that are stacked and encased within a steel frame. This combination of materials provides durability and strength to withstand the rigors of transportation.
The plywood panels are cut to size and attached to the steel frame using screws or rivets, ensuring a tight and secure fit. Once the wall panels are assembled, they are then attached to the floor and roof sections of the container. This creates a solid structure that can withstand the weight of goods and the forces exerted during shipping.
B. Floor Frame Assembly
Once the steel sheets have been corrugated, they’re ready to be assembled into the floor frame of the container. The floor frame assembly starts by placing beams on the corrugated sheets, creating the foundation for the container’s floor. These beams are secured in place using a paint stick, ensuring stability and strength.
An additional layer of corrugated steel is then added on top of the beams, providing reinforcement. This process requires manual labor, with workers carefully positioning each piece to ensure proper alignment.
Once the first layer is in place, the side walls of the container can be installed on the floor frame. This step completes the floor frame assembly, setting the stage for the next phase of the container manufacturing process.
With the floor frame complete, the container is now ready for the installation of the power unit and further assembly.
C. Doors and Corner Posts
Using a combination of materials and machines, I-beams are securely welded together to construct the base of the container, ensuring its strength and stability.
Once the base is in place, the next step in constructing the container involves installing the doors and corner posts. These elements are crucial for the functionality and durability of the container.
The doors are carefully measured and installed using specialized equipment, ensuring a perfect fit. Corner posts, made from high-strength steel, are then welded onto the base and walls of the container, providing additional structural support.
Before the container is deemed ready for use, it undergoes rigorous testing to ensure it can withstand the weight and conditions it will encounter during transportation.
The strength of the container, along with its panels and doors, ensures that your cargo will be protected during its journey.
D. Completing the Box
Once the corner posts are securely in place, the final steps of completing the box can begin.
To create a sturdy structure, longer I beams are used for the top and bottom of the container, while smaller I beams are used for the sides. This design ensures that the right container is strong enough to withstand the rigors of transportation.
After the I beams are welded together, the panels are placed on the frame. These panels are made from different materials depending on the usage and type of container.
Finally, a coat of paint is applied to protect the container from corrosion. This adds strength to the structure and ensures its longevity.
G. Decals, Identification, and Doors
To add decals to your wooden flooring, you can choose from a variety of designs and sizes that suit your preferences. Whether you want something simple and elegant or bold and eye-catching, there are options available for every style. Decals can give your flooring a unique and personalized touch, adding visual interest to any room.
Applying decals is a relatively simple process that can be done by anyone. Start by cleaning the surface of the flooring to remove any dirt or dust. Then, carefully peel off the backing of the decal and position it on the desired area. Smooth out any air bubbles with a credit card or similar tool.
H. Waterproofing and Testing
When waterproofing and testing, make sure that the container’s seals are intact and that there are no leaks. This step is crucial to ensure that the shipping container is capable of protecting its contents from water damage during transportation.
To begin, thoroughly inspect the seals around the container’s doors, windows, and any other potential entry points for water. Look for any signs of wear or damage, such as cracks or gaps. If any issues are found, repair or replace the seals as necessary.
Next, conduct a leak test by spraying water onto the container’s exterior and carefully observing for any water penetration. Pay close attention to areas where the container panels are joined together. If any leaks are detected, they must be addressed and resolved before the container can be deemed waterproof.
Conclusion
You’ve learned about the fascinating process of how shipping containers are made.
From their humble beginnings to their worldwide impact, these containers have revolutionized the transportation industry.
The meticulous manufacturing process ensures their durability and resistance to water, making them reliable for long journeys.
As you reflect on their importance, you can appreciate the hard work and innovation that goes into creating these versatile structures.
So next time you see a shipping container, remember the incredible journey it took to reach its destination.